Feeds:
Posts
Comments

Posts Tagged ‘Raid Guide’


After you take out the trash, have someone hit the big gong to make Atramedes come out and start his painfully long RP sequence. Don’t get me wrong I like the sequence and am glad that you don’t have to watch it every time you start the fight like Saurfang but there’s a reason every boss encounter doesn’t start with one.

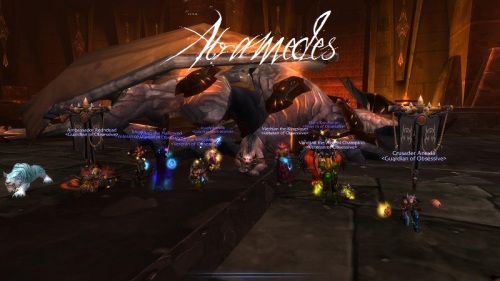
When it’s finally time to get down to business out team starts by tanking atramedes on the right side. Unlike most dragons, this one has no tail whip so don’t be afraid to move toward the tail if you have to. We normally have our tank near the first gong and the rest of our team stacks up on the side of this beast.

Positioning the boss is going to be a very important part of this encounter. Being alongside the boss as opposed to behind the boss allows the team a little more time to see Sonar Pulse, allowing slightly longer to get out-of-the-way. Sonar Pulse like everything else in this fight adds sound to your sounds meter. When any member of the raid reaches 100% they get destroyed by the big blind bird.

I had my team download Atramedes, the addon which gives you an easy to read little box that lists the top five teammates with the highest sound and their sound level percentage. Do your best to avoid anything and everything this guy throws at you during the fight and it’s not too hard to stay alive and down the boss.

Along with the Pulses, the dragon will Sonic Breath and Searing Flames while on the ground. Sonic Breath is an ability that targets and follows the person with the highest sounds. We counter this by choosing a direction that the person should run and everyone else moves just a bit in the opposite direction. This works really well if people can tell their left from their right. For those of you who have trouble with this, I suggest post-it notes on the sides of your screen.

Searing Flames creates more sound than a road construction crew outside your window,  the morning of your day off.  This AOE damage is probably the most healing intensive part of the fight so be ready. This is where you’re going to want to use your Holy Radiance and other AoE heals for sure. This is also the point where the tank is going to want to gong the teams sound level back to zero before someone gets ate.

At this point I’ve covered everything you need to worry about in phase one. After eighty seconds of this, this bird is taking to the air. Phase two is pretty simple. It’s a good idea to gong just after liftoff. You’re going to choose a member of your team to kite Roaring Flame Breath. This ability will always target the player who last hit the gong. We use a feral drood for the ability but anyone with a bonus to speed would work well.

Everyone else just needs to stay out of the poop on the ground and dps that Big Bird untill phase one starts again. When phase one begins you’re going to set up shop on the other side of the room by the remaining gongs. Phase two last for sixty seconds.

This is an easy encounter with a really cool sounds mechanic. More about staying out of the poop this monkey is flinging at you, raid awareness is key to the encounter.
Read Full Post »

I kid, I kid, But really, you should have seen the look on your faces when you read this title. I have been seeing a whole lot of qq on the forums (Still?) about the latest edition to the World of Warcraft legacy being too hard. I personally don’t think it’s shaping out to be too hard or too easy. Of course I am a Pally healer and I do have plenty of nerfs in my future.

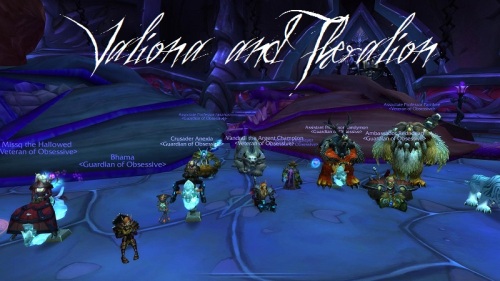
Obsessive, my ten man raid team was able to one shot Double Dragons on Tuesday night. This was a big credit to Adgamorix’s (of Divine Plea) response to me calling in a life line for tips on this fight. Thanks dood! Using their strat we were able to cut down our kill time significantly and able to cut down on overall healing. In case you missed the comment, the main difference in this strat with the one we were using is this…

During the second phase you have a mele group stacked on the butt of the dragon you have your ranged group spread out around the dragon (within healing range) instead of stacking. When one of the ranged folks get the Twilight Meteor debuff they run to the mele group to split the damage.

This means that half of the people in our raid are going to be moving less than if they were stacked. They will also be taking less damage from Engulfing Magic and Void Zones. The only time they will need to move is for the Meteor or if a Void Zone spawns under them. This makes Engulfing Magic a no brainer for the ranged because they can just stay where they are and dps without hurting anyone else in the raid.

I also like this because if I get EM and change lanes without checking my blind spot then I only have to worry about nuking one player instead of a carload of them. Love this because using boss mechanics to nuke most of the raid is like a FFVII style Limit Break for me. You could say it’s my special ability 🙂

With this tip and some practice your group should be able to one-shot the boss every time. Heres a quick rundown of the fight.

Valiona’s (purple dragon) first, position the raid five yards apart around the boss to avoid taking damage from Twilight Blasts. We practiced our positioning on Red’s Pet which was kinda silly and fun but kinda helped. Run in for Blackout, Cleanse it and run out (if you don’t have Sacred Cleansing talented then someone else will have to do it). During the Blackout healers should pop their AOE heals (like HR) becuase this part can be a bit messy if not timed perfectly around Twilight Blasts.

You will have to deal with the occasional frontal cone AOE, Devouring Flames. Just move to the back-end of the boss and then return to the original positions. Someone usually takes some damage from this so be ready to heal them up fast. Rinse, repeat, phase two is starting when she puts down Dazzling Destruction. Get sucked in you end up in the Twilight Zone or some terrible place like it and you have to click on the portal to get out.

Theralion (blue dragon) comes down and it’s time to put the strat above into action. Mele stack on the butt, ranged spread out around the dragon. Ranged move in for Meteor, Mele move out for the Engulfing Magic. DBM will mark players with these debuffs. Also remember to stay out of the poop (Void Zones). Toward the end of the phase you’ll have to deal with three bouts of Deep Breaths from the flying dragon. Have a member call out safe zones. Stairs, Mid, Door worked pretty well for us.

Awesome fight with some cool mechanics. Now we are working on Al’Akir and Atramedes as our progression. We got Atramedes down to about 40% health on Monday so hopefully we can open it up and take it home the next time we get in there. I’ll let you know. Thanks for reading and enjoying and I want to hear from YOU, Do you think Cata is too easy? Too hard? Or not as bad as everyone is saying? let me know.

Read Full Post »

If you read the comments thread from my last post then you already know that last night we downed Maloriak and I got the healing trinket Jar of Ancient Remedies. I could not be more pleased with the way the team performed last night. Each attempt we got steadily closer and closer to downing the boss.

It doesn’t always happen that way. Sometimes it can seem like your team is working backwards. We’ve all been there, after a long night of wiping, people are starting to lose their concetration and get sloppy. Our raid leader usually calls it early if he notices that we are fighting the morale monster along side the boss.

This is always greatly appreciated and I feel like it actually helps us in the future. I feel like (and you may have experienced this) players can get a mental block which can keep them from downing a boss as a result of low morale. Raid leader take note, if you notice your team is loosing that forward momentum on a boss move on to a different boss or call it a night. The extra time spent wiping should not be considered valuable practice attempts.

Here’s some more food for thought. No it’s not pie and it’s definently not cake, the cake is a lie. I am mostly solely responsible for keeping both tanks up during the encounter. I get help from the other healers in emergency situations but in obsessive we echew the model where you assign a healer to each tank. Instead we have two “raid” healers and we all work together to help out where we can if needed. Most my time spent is healing the unbeaconed tank, spamming LoD on the raid and shooting off a quick heal if I see someone who is scary low on health.

As we all know there is usually a running commentary going on in most raids between the tanks and the healers. Good communication is always important but vent can get pretty crowded with too many people talking. Our tanks are nice enough to let us know when they are going to be taking big damage by shouting “Big Heals!”   Big heals means that the tank who yells it is going to have to be peeled off the floor if we don’t react fast.

This is fool-proof for abilities like Magmaw’s Mangle and Maloriak’s Dibilitating Slime. It’s great for me becuase I have trouble with tunnel vision while watching healthbars and Cd timers. Usually the raid leader is going to be calling out a lot of different abilites by name but abilities that effect the healers get our special little code word. If your tanks are not already giving the healers tipoffs like this for progression content then you can recommend it. Feel free to borrow Big Heals too. I found it really useful on Maloriak to hold off on using HoSac (which I normally use on Cd as a mana saving device) untill Nex utters (in his charming french-canadian accent) those two spiffy little words.

Next up we will be working on Atramedes and did I mention that we downed double dragons sometime in the last two weeks? Expect a strat posted with some tips the next time we down it. Also any tips on that fight are greatly appreciated as it wasn’t a very clean kill last time and I’m not looking forward to stepping to the duo again.

Read Full Post »

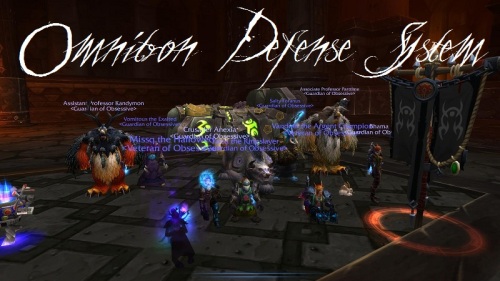
On Monday evening we easily downed Omnitron. We had stacked some good  practice attempts under our belt from last week so we were able to one shot it. Not a bad fight in terms of mechanics. It’s the standard don’t stand in this, kite and nuke adds, move out of the laser, swap boss targets with shared health pool council style fight. There is a lot of damage hitting the raid and I found that though I was the prescribed tank healer, I needed to help out with heals where I could.

I used HR like Paragon uses Druids during this encounter and this took a serious drain on my mana pool. One tip I would recommend is having someone call out the blue circle (Power Generator) that healers can stand in to restore mana. They can be difficult to see during the encounter as there is graphical mayhem all over the place. These bosses have a never ending health pool and mana was a serious issue towards the end of the fight.

Taking a healing reduction from DP whenever it came off Cd was not an issue. Despite using it on Cd, I still needed two innervates during the fight. By the end of the fight I was tossing whatever heals I could out to heal the tanks with no mana and desperately counting down the seconds until DP came of Cd. If you are struggling with mana it may be better to BL/TW during Arcanotron when the healers are all standing in a blue circle as the effects of BL/TW stack with Power Generator.

We spent the rest of the night getting cozy with the creepiest alchemist and creator of Chimera…

 Despite the vicious rumor that at its core Maloriak is just a tank and spank, there is a lot more to it than that. There are adds, there are interrupts, there is an iceblock that does damage when you’re put inside and damage when you’re broken out.  There is a frontal cone AOE effect that the raid has to stack for and someone who gets a debuff and has to run out of the group.

This AOE hits for a lot so this is where you’re going to use your HR along with AW if you have it available for use. You’re going to want to pop DP as much as you can during this fight and I found that directly after the adds go down after the green vial goes out was an ok place to pop it.

Mana wasn’t too big an issue for me on this fight so don’t be afraid to share that extra mana by spot healing the raid if things get hairy.  I will write another post on this encounter when we down it. When we called it on Monday we were beating our faces against his enrage so expect a post soon.

Read Full Post »

Last night my raid team and I downed Magmaw. Another first tier raid boss, like the others this boss was easy and straightforward. It has a very fun mechanic where three dps jump up on Magmaw, chain the spike and pull his head down onto it. During this phase I was regenerating as much mana as possible and dpsing Magmaw’s impaled head with Judge and CS, even threw down a Cons once or twice.

Instead of using the Tankspot strat where you spit mele, ranged and tanks into the stacking groups, stacked everyone under the left side of the boss, the tanks under the right and our hunter kited the adds within range of the healers. The Pillar of Flame never spawned under our dps or tank group in any of our attempts. It is less likely to happen if everyone is within mele range.

We tried not dpsing the Lava Parasites, having our hunter kite all of them around during the fight. This ended up being more trouble and we decided it proved easier to just dps them down as they spawned.

Magmaw will cast Ignition, marking the beginning of phase 2. When the smoke would appear on the left side where the dps were, then everyone would go to the right of the boss where the tanks were. If the tanks were in the Ignition then we just healed them through the extra damage. After Ignition the worm slumps forward where the flames were. stunning and causing damage to anyone crushed underneath. This is something that people really want to avoid taking damage from because a lot of healing needs to be focused on the tank who is taking a lot of damage from Mangle. Believe it or not HoSac on the tank and AW worked well together here. Have I mentioned how much I love HoSac enough? Best Cd ever!

Three dps climb up on Magmaw and use their mouse to target the spike, and spam 1 for Constricting Chains till you bring that bitch down. As mentioned before this is where you pop everything to restore your mana and throw out whatever dps you can add to the fray. All the while use up HoPo to get everyone back to full health and ready to transition back into phase one.

After a celebratory pic and ten minute break we headed over to Omnitron and got in some good attempts. I expect it will not take us much time to down the fight on Monday so you can expect a guide for the fight to be posted soon. Hope you’re enjoying these encounters as much as I am.

Read Full Post »

Yesterday we had a blizzard here in Boston. Some areas reported as much as 13 inches of accumulation and that’s not even counting snow drifts! I had the day off from work and besides sleeping in, catching up on some reading, and having dinner with my neighbor, most of my lazy day was spent in Azeroth. I finally finished up my Cata Loremaster Achievement dragging my feet through the last 30 quests in Vashj’ir to snag the 20,000 Leagues Achievement. Some guidlies and I also got together and traveled across Kalimdor and some of EK and killed old world dungeon bosses for the guild Achievements. There are still some that I need on Bhama as well, so I was happy to tag along.

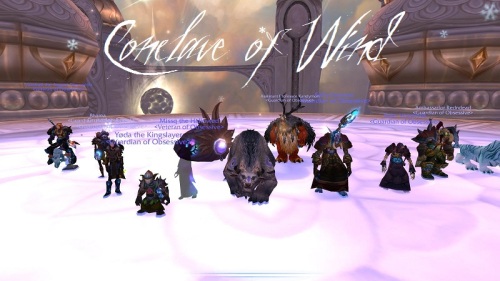
Getting prepared for the incoming snow storm I forgot to tell you that downed Conclave of the Wind on Tuesday night. It was our first night attempting this encouter and before we got started, I took the time to watch several videos on the fight. There is a lot to it, with three bosses in one fight and watching the videos, I felt like I should be taking notes. So I did, and heres a rundown for your viewing pleasure.

Conclave of the Wind

Anshal- West  Platform

  • Must be engaged at all times or it’s a wipe (Withering Winds)
  • Summons a green circle that continously heals him and adds and silences the raid (Soothing Breeze)
  • Summons adds at 30% energy, they put a dot on anyone in range
  • At 90% energy casts ultimate (Zephyr) which heals the boss and gives him a stacking dps buff.

Nezir- North Platform

  • Must be engaged at all times or it’s a wipe (Chilling Winds)
  • Casts a stacking debuff (Wind Chill) that causes frost dmg and increases frost all frost dmg taken by 10%
  • Casts a frontal cone frost dmg spell (Permafrost), only the tank should be getting hit by this
  • Lays down an ice patch that slows movement and causes frost damage
  • at 90% energy casts ultimate (Sleet Storm), a massive AoE where damage is spit between targets

Rohash- East Platform

  • Must be engaged at all times or it’s a wipe (Deafening Winds)
  • Cast (Slicing Gale) nature dmg to a random target that adds a stacking debuff, increasing nature dmg by 5%
  • At 30% energy he will start spining around the platform and Windblast in front causing nature dmg and knocking players back 200 yards. Don’t get hit by this!
  • Summons tornados that do nature dmg and cause a ten yard knockback.
  • At 90% energy he will grab everyone up (Vortex), toss a dot on them and throw them down resulting in even more dmg.

Our Strat

 We had our bear tank RL, Stink and resto sham on Anshal, along with our ret pally, our hunter and boomkin. This team worked very well for killing the adds quickly. Myself and Anexia spent most of the time alone at Nezir. Our shadow priest, resto drood, and mage held the east platform with Rohash.

This fight is Four Horseman 2.0; every boss must be engaged at all times or it’s a wipe. Also, each boss has to die within one minute of the first. The hardest part of this fight is not getting knocked off the platform by Rohash. The rest is pretty straighforward.

On the healy boss, Anshal burn the adds and make sure none are up at the time of the ultimate. Swap to the frost boss Nezir to help mitigate damage from his ultimate.

On the frost boss Nezir, pallys are win. This is the best tip I can give about this fight. Having two pallies lets you bubble through the first and fourth ultimate. Yes you will have to take 2 seconds of the damage but it is easily healed. This allows you to leave your dps where there are, saving time on swaps. Nezir’s tank and healer team and Rohash’s team will need to change platforms periodically before an ultimate to drop the Windchill debuff. 

This is how it went down. Nex and I bubbled through the first ultimate, jumped over before the next one. After the ultimate the dpsers jumped back to Anshal to dps. I healed them untill the right before the next ultimate when the the healer and tanks swapped and the dps went to Nezir again to help spread out the damage. After that they jumped back over to Anshal. We bubbled again through the next ultimate and both Anshal and Rohash were downed. Everyone came over to us and we burned Nezir.

As stated earlier Rohash is the hardest boss because of the knockback effects involved in the fight and because the damage from vortex is difficult to heal. If possible, levitate, slowfall or other spells should be used to mitigate some of this damage. This will make the healers life a lot easier. He requires less dps becuase there are no adds and he should go down at the same time as Anshal. Once they’re dead everyone jumps to Nezir and burns him. Once the first two go down the fight has basically been done.

Sounds silly complicated I know. But once you get in there, practice it a bit and get the hang of how your groups are going to swap, you should be able to do this no problem. This is a really fun fight and I could see groups of players pugging it in the future. I hope the Al’Akir fight is as fun as this. I heard he grows ginormous and you fly around him in phase three of the fight. Can’t wait!

Read Full Post »